Form Targeting Explained
What is Targeting?
When we enter a new form in the system, we fill out details regarding the Announcement, Event, Fee, Team, or Trip, and are then asked to ‘Target’ the information to the student. This is essentially the audience that we want to target when we publish the form.
So how do parents/guardians see the form that is targeted to their child?
When a parent self-registers for their account (follow the New Parent Registration link on the Parent Portal Login page), they are asked to fill in some personal information including their e-mail address. This is then verified by email, and they are allowed to login to the site. It is important to note that no information relating to their children will be displayed yet. The following screen grab (Figure 1) is what will be displayed until at least one student has been linked to their parent account, using the information from the Linking Letter provided by the school your child attends.
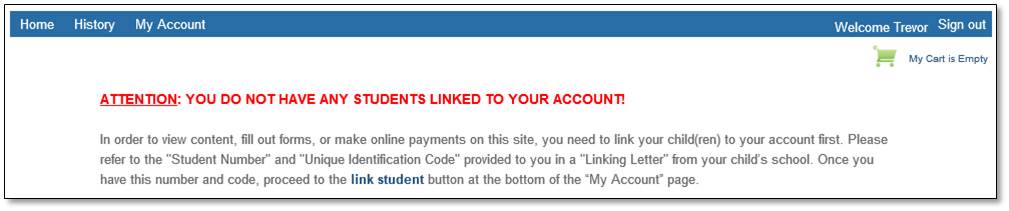
Figure 1: This is what a new parent sees at first login
When a parent clicks the ‘link student’ hyperlink above (or from their My Account page), they are taken to the student linking dialogue shown below (Figure 2). They are then asked to provide the Linking Key and Pupil Number from the letter provided, as well as their child’s Date of Birth (this is not provided on the letter). Once the parent-student link is established, the parent can then:
- See forms targeted to that student
- Receive immediate email notifications when a proposed form is approved
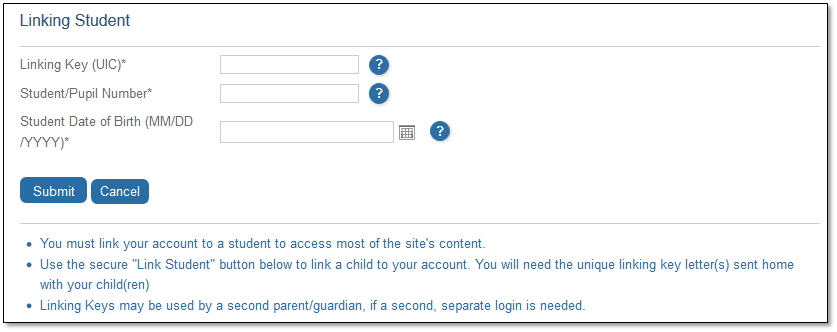
Figure 2: Establishing a Parent-Student Link
So how do I target students?
Once you complete filling out the information page of a form proposal you are taken to a series of targeting pages, as shown below.
First, we select the grade(s) based on the grade range applicable to your school
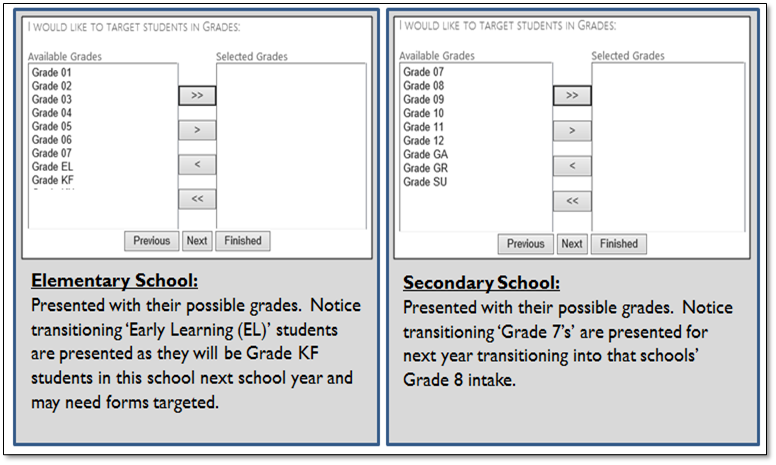
Figure 3: Applicable grade ranges for Elementary and Secondary
On the next screen, you are given various further filtering options to narrow down the list of students you want the form to target, such as:
- Class (such as Science 8 at secondary)
- ESIS Team/Group (allows you to reuse the Team/Group lists you can create in ESIS in Targeting)
- Homeroom (secondary homerooms)
- Division (elementary divisions)
- Parent Portal Team (not available currently – use ESIS Team/Group instead)
- Teacher (if used at this step, you are presented with a list of ALL their students on the next screen)
- Teacher (this can be selected AFTER choosing the class in the below screen, to target students from a particular teacher’s course)
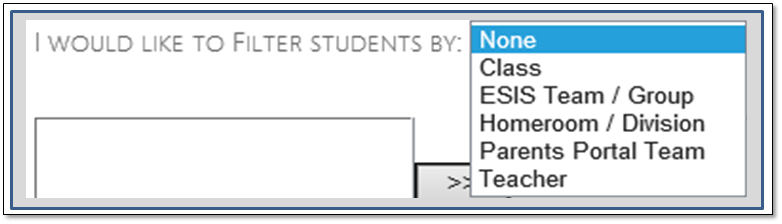
Figure 4: Filtering students by Class
If you select either Homeroom, or Division, this is the screen you will be presented with:
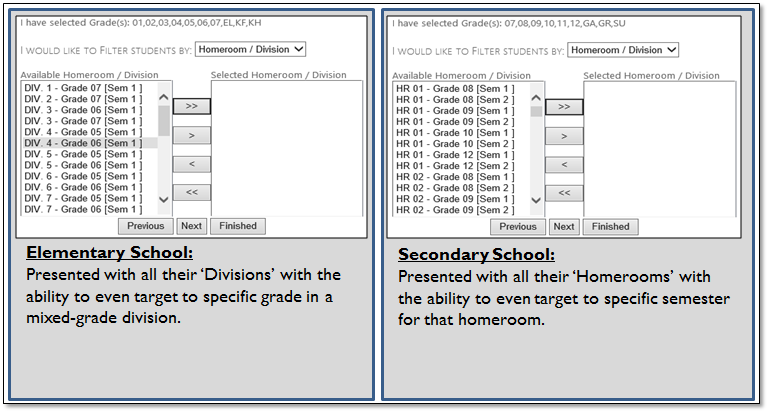
Figure 5: Selecting Homeroom or Division
No matter which way you choose to limit the list of students, the final targeting screen will allow you to select individual students (Figure 6).
At any point in the targeting process, if you are happy with the filtering of students that you have carried out so far, you can simply click the Finished button to end the targeting process.
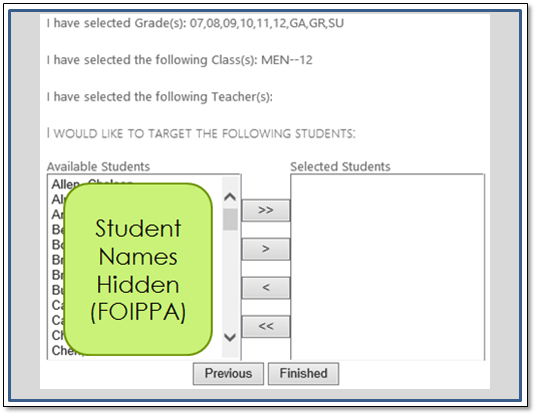
Figure 6: Selecting individual students
You are then presented with a summary of your targeting selections and provided with an opportunity to start over, edit current selections, or submit. Once you submit the form, it makes it’s way over into the approval queue for administrator review and approval. Once a decision has been made by your school administrator (and the board office in cases of Level 2 field trips), you will receive an email notification back with the status of the request. Only registered parents/guardians will receive email notifications regarding the final decision of the request.
![]() Back to Parent Portal Help Site
Back to Parent Portal Help Site